This section of the documentation contains guidelines on how to quickly setup a scene for NavAI. The following subsections assume the reader is familiar with Unity Engine and all of it's basic interface features, how to create a scene, place objects and use the inspector and other windows.
Installation
Before installing NavAI into your project, it is recommended to first make a backup of all your project files. Once the backup is complete, you can proceed with the following steps.
To install NavAI into your Unity Project:
- Open the project with Unity Engine.
- Import the NavAI package into your project
- Open the Asset Store Window
- Select the NavAI asset
- Click Import
- The following window should pop up:
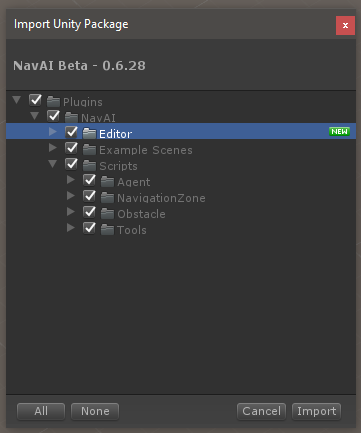
- Select files to import
- Editor Folder: Required. All files within this folder must be selected.
- Example Scenes: Optional. Folder containing examples on how to use NavAI.
- Scripts: Required. All files within this folder must be selected
- Click Import
By default, NavAI will be installed under a Plugins folder to keep your project organized. To avoid errors, do not move, rename or change NavAI's folder paths in any way. Some of NavAI's Editor uses hard-coded paths to the Plugins folder, and changing paths of folders used by NavAI can cause errors.
Scene Setup
Once NavAI packaged is properly imported into the project, it is possible to set up existing scenes for use with it or to create new scenes for it. This section of the documentation will guide you through creating a new scene and using it with NavAI.
- Create a new Scene (Ctrl+N)
- Create something for agents to walk over. It can be a terrain, a plane or a box. For this example, we'll be using a Plane. (Hierarchy->Create->3D Object->Plane)
- Scale the plane to (2, 2, 2)
- Position the plane at (0, 0, 0)
- Create and place boxes as obstacles for the navmesh. (Hierarchy->Create->3D Object->Cube)
- Position, scale and rotate boxes as desired.
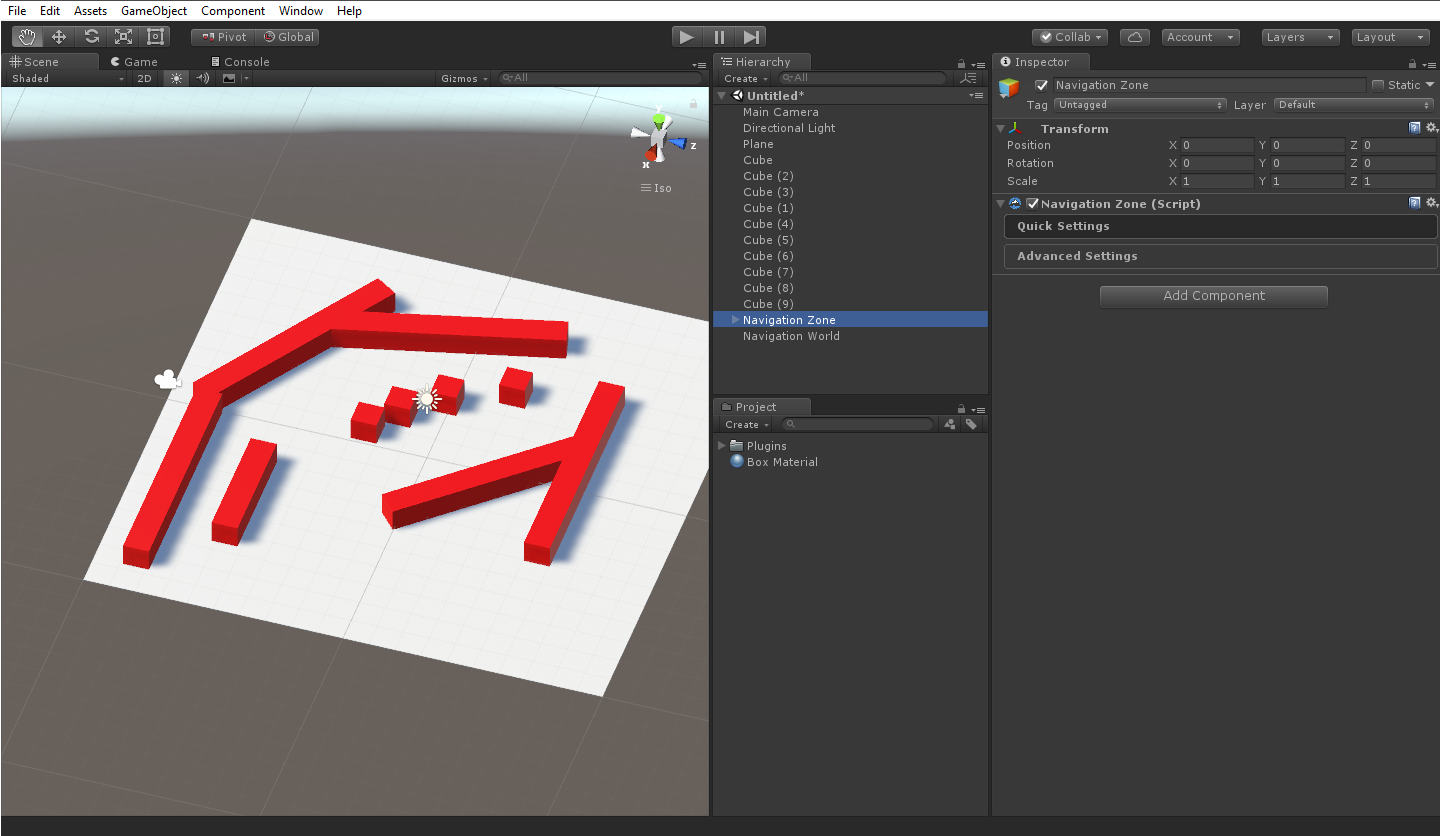
- Create an Empty Object and name it "Navigation Zone". (Hierarchy->Create->Create Empty)
- Select the newly created empty object, and click the Add Component Button under the inspector. Add a NavigationZone component to the object. (NavAI/Navigation Zone)
- Your scene and hierarchy should look like this (We have added a red material to the boxes to make them more visible, but this step is not necessary):
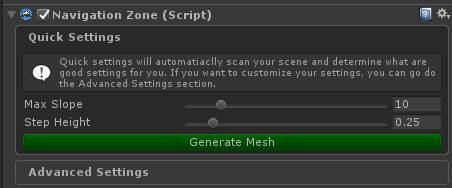
- Open the Quick Settings Tab under the Navigation Zone inspector
- Set Max Slope to 10 degrees.
- Set Step height to 0.25 meters.
- Click Generate Mesh
- You should see the navmesh gizmos being drawn on the scene. Surfaces the AI can walk on are drawn in blue.

Once the mesh is generated, the scene is ready for use with NavAI. Additional changes can be made to the way the mesh is generated, increasing it's resolution, precision as well as other properties. For a complete list of the advanced settings, read the Advanced Settings section of this document.
Adding Agents to the Scene
The next step is adding agents to the scene. Agents are intelligent entities that can navigate around the environment while avoid collisions with other objects.
Adding an agent to the scene, is as simple as adding an Agent component to a scene object. For this tutorial, we'll be using the Zombunny model provided by Unity in one of their examples as an agent.
The Zombunny model is included by default on the NavAI Example Scenes folder. To avoid the need of putting the Zombunny pieces together (model, textures, shaders, etc), a prefab is available under the NavAI/Example Scenes/Prefabs/Agents folder. The prefab we'll be using is named "Zombunny".
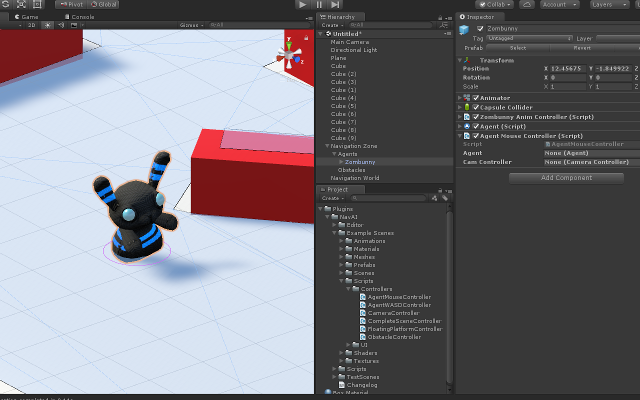
- Drag and drop the prefab located in "Plugins/NavAI/Example Scenes/Prefabs/Agents/Zombunny" into the scene. You can add as many Zombunnies as you like to the scene.
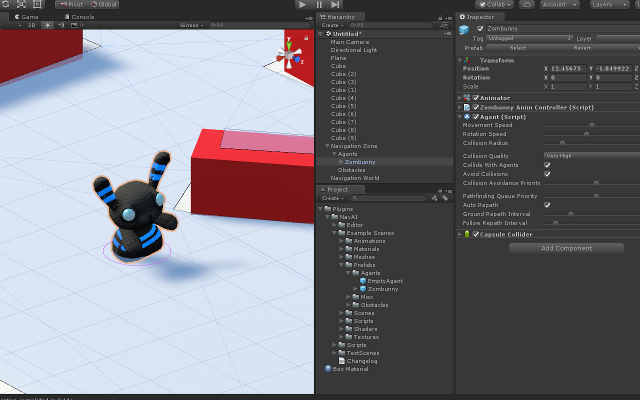
The provided prefab has a few components included in it:
- Animator:
- Component responsible for the agent animations. This component is not required by NavAI, but you probably want it to play the agent animations.
- Capsule Collider:
- Physics collider used for the object. This component is not required by NavAI, but you probably want it for your game physics.
- Zombunny Anim Controller:
- Custom script used to pass parameters to the Animator. This is not required by NavAI, but if you're using an Animator, you probably want a script to pass it some parameters. This example script is a very simple code that tells the animator to switch between the Idle and Walk animations, and also pass the animation speed parameter to it.
- Agent
- This is the component used by NavAI to identify Agents. The basic parameters of this component are the agent movement speed, rotation speed and collision radius. For more information on the Agent component variables, read the Classes/Agent section of this document.
The Agent component is the only component required by NavAI for the agents, but the other components are included in the prefab to give an example of how to properly setup your game characters.
For the purpose of this tutorial, there is no need to change any parameter of the Agent component, but you can change them as you like.
Adding the Agent component to an object of the scene is enough to make the object ready to navigate the environment as an intelligent agent.
Controlling Agents
Now that we have agents ready for use on the scene, we need to control these agents, telling them where to go.
The imported NavAI package includes a few simple scripts for controlling agents. For this tutorial, we'll be using the AgentMouseController.cs script located at "Plugins/NavAI/Example Scenes/Scripts/Controllers/AgentMouseController.cs"
- Drag and drop the AgentMouseController.cs into the scene agent you want to control.
- Select the Main Camera on the Hierarchy and adjust the camera position and angle so that it can view the scene (Ctrl+Shift+F)
- Hit Play
While playing, the agent will continuously follow the mouse through the environment, calculating paths and avoiding collisions with objects. The AgentMouseController.cs script automatically adds a CameraController.cs componenet to the camera. The camera can be controlled using the middle mouse button, right mouses button and the keyboard arrow keys.
Now let us take a look at the AgentMouseController.cs script to understand how to control an agent.
public Agent agent;                         //  Agent component.
public CameraController camController;      //  Main camera's controller.
The first lines of the script contain the agent and the camController variables. The agent variables is a reference to the Agent component of the gameObject, and the camControllere is a reference to the CameraController componenet of the Main Camera. The agent variable will be used to pass commands to the Agent. The camController variable, will be used to get the mouse position in the world from the camera.
Now let us take a loot at the Start() method:
void Start()
{
    /// Get the Agent component.
    agent = GetComponent<Agent>();

    if (agent == null)
    {
        Debug.LogWarning("Agent not found!");
    }

    /// Get the camera controller component.
    if (Camera.main != null)
    {
        camController = Camera.main.GetComponent<CameraController>();
        if(camController == null)
        {
            camController = Camera.main.gameObject.AddComponent<CameraController>();
        }
    }

    if (camController == null)
    {
        Debug.LogWarning("Camera Controller not found!");
    }
}
On the Start() function, we get the agent and camController variables.
Next, and most important, is the Update() method, in which we'll be giving movement orders to the Agent:
void Update()
{
    /// Ignore if cameraController or agent is null.
    if (camController == null || agent == null)
    {
        return;
    }

    /// Get the current mouse world position.
    Vector3 mousePosition = camController.GetMousePosition();

    /// Set the agent destination to the mouse position.
    agent.SetDestination(mousePosition);
}
Giving a basic movement order to the agent consists of two steps:
- Getting the movement destination.
- Sending the movement command.
The movement destination used for this controller is the world position of the mouse. We get this Vector3 with the command:
Vector3 mousePosition camController.GetMousePosition();
Ordering the agent to move to that position is as simple as setting it's destination to that point:
agent.SetDestination(mousePosition);
There are more advanced commands that can be given to the agent, such as ordering it to follow another agent, setting it's desired velocity and other commands. To a complete list of the Agent's methods, read the Agent Class documentation.
Adding Dynamic Obstacles
To add an obstacle that can move at runtime, it is needed to add an Obstacle componenet to an object and configure it properly. This can be done with a few steps:
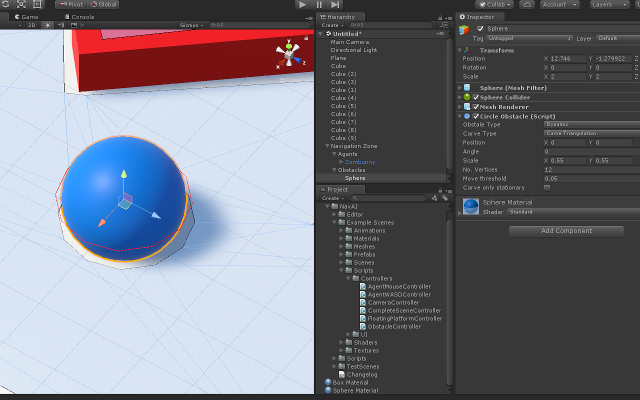
- Create an object you want to use as the dynamic obstacle. We'll use a Sphere for this example (Hierarchy->Create->3D Object->Sphere).
- Position and Scale the sphere as desired.
- Add a CircleObstacle componenet to the gameObject (Add Componenet/NavAI/Circle Obstacle).
- Change the Obstacle Type from Static to Dynamic
- Set the Carve Type to Carve Triangulation
- Configure the Scale and Number of Vertices as desired.
The dyanmic Obstacle can be moved using the transform tools provided by Unity. You can move the sphere around the scene and you should see the navmesh automatically update as the obstacle changes its position (If not in play-mode, automatic navmesh update will require the Execute In Edit Mode option turned on under the Advanced Settings of the Navigation Zone (AdvancedSettings/NavMesh/Execute In Edit Mode).
A custom script can be used to move the obstacle by changing it's transform over time. There is no need to access the Obstacle's properties or methods, everything will update automatically as the transform of the Obstacle changes. To delete the Obstacle, you can simply destroy it.
Additional Settings
Additional settings for the NavMesh, the Agents and everything else can be found under the Navigation Zone Advanced Settings. To edit these settings, select the object containing the Navigation Zone component and open the Advanced Settings tab under the Inspector.
For more detailed information on how to use the advanced settings, read the Advanced Settings section.